Cocoapods
pod install vs. pod update
pod install: This is to be used the first time you want to retrieve the pods for the project, but also every time you edit your Podfile to add, update or remove a pod.
Every time the pod install command is run — and downloads and install new pods — it writes the version it has installed, for each pods, in the Podfile.lock file. This file keeps track of the installed version of each pod and locks those versions. When you run pod install, it only resolves dependencies for pods that are not already listed in the Podfile.lock. For pods listed in the Podfile.lock, it downloads the explicit version listed in the Podfile.lock without trying to check if a newer version is available.
pod update: It will update the pod to the latest version possible (as long as it matches the version restrictions in your Podfile).
pod 'SSZipArchive' ## use the latest version
pod 'Objection', '0.9' ## specific version
pod 'Objection', '~> 0.1.2' ## Version 0.1.2 and the versions up to 0.2, not including 0.2 and higher

pod 'Alamofire', :path => '~/Documents/Alamofire' ## a folder local to the machine

pod 'Alamofire', :git => 'https://github.com/Alamofire/Alamofire.git' ## To use the master branch of the repo
pod 'Alamofire', :git => 'https://github.com/Alamofire/Alamofire.git', :branch => 'dev' ## To use a different branch of the repo:
pod 'Alamofire', :git => 'https://github.com/Alamofire/Alamofire.git', :tag => '3.1.1' ## To use a tag of the repo
pod 'Alamofire', :git => 'https://github.com/Alamofire/Alamofire.git', :commit => '0f506b1c45' ## Or specify a commit
创建自己的 Pod
我们先看看 CocoaPods 在本地目录里的东西:cd ~/.cocoapods/repos,这里存放着 Pod 的仓库目录,其中的master文件夹是 CocoaPods 官方的仓库。如果你添加过其他的 repo,这里还会有其他文件夹。
cd ~/.cocoapods/repos/master,通过git remote -v,发现master文件夹是一个 git 仓库,它的远端是:
origin https://github.com/CocoaPods/Specs.git (fetch)
origin https://github.com/CocoaPods/Specs.git (push)
每个第三方库会有多个版本号,每个版本号是一个文件夹,其中有一个*.podspec.json。比如:
~/.cocoapods/repos/master/Specs/0/0/1/YYImage/1.0.4/YYImage.podspec.json
注意,第三方库的源代码不会放在 Specs 文件夹里,这里只放描述信息。
想要在 Cocoapods 中发布仓库,就是需要在~/.cocoapods/repos/master中添加我们的仓库的描述信息,然后 push 到远端。不过不用我们通过 git 命令,直接用 pod 命令操作即可。
Running pod lib create [pod name] will set you up with a well thought out library structure allowing you to easily include your files and get started quickly.
You should be testing your library. In Objective-C Specta/Expecta. In Swift Quick/Nimble. For View-based Testing: iOSSnapshotTestCase.
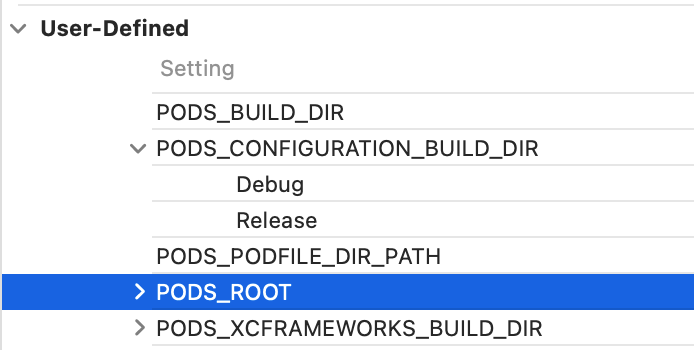
${PODS_ROOT} 定义在 Build Settings - User-Defined:
创建 SDK 代码库
创建 podspec 文件:pod spec create SampleLib,打开 SampleLib.podspec 文件并编辑好相关配置。可以参考别的第三方库的配置如 YYImage。
验证仓库是否配置正确:pod lib lint,验证正确后,就可以把描述文件推到远端了。然后,打上版本号的 tag,注意这个 tag 是与.podspec 文件中的版本对应的。
pod lib lint does not access the network, whereas pod spec lint checks the external repo and associated tag.
pod lib lint --verbose --sources='https://demo1.sources.com,https://demo2.sources.com' --no-clean --use-libraries --allow-warnings --skip-import-validation
遇到编译错误,就添加 --skip-import-validation。
验证成功后,可以发布到我们的私有库描述文件中:pod repo push MyRepo SampleLib.podspec --allow-warnings;这时会再验证一次配置是否正确,成功的话,我们的 ~/.cocoapods/repos/MyRepo 中就会增加这个新的库了。
使用 pod search SampleLib 验证,若出现仓库信息说明已经成功了,这时候就可以在 Podfile 添加、使用自己的仓库了。
集成 Framework
首先要有一个工程,其中的 TARGETS 有我们想打包出来的 Framework。在工程里正常 build 后,产物会在 /Users/zhouyian/Library/Developer/Xcode/DerivedData 目录下,也可以在 Project Navigator - Products 下面找到。
在工程目录下运行命令:
xcodebuild -configuration "Release" -target "${FRAMEWORK_NAME}" -sdk iphoneos clean build
会将 Framework 打包到当前文件夹下。然后创建 podspec 文件并声明 s.vendored_frameworks = 'path/to/framework' 即可。
发布到官方源
官方源:source "https://cdn.cocoapods.org/"
手动克隆官方源:pod repo add-cdn trunk https://cdn.cocoapods.org/
发表到官方仓库需要一个“账户”:CocoaPods Trunk is an authentication and CocoaPods API service. To publish new or updated libraries to CocoaPods for public release you will need to be registered with Trunk and have a valid Trunk session on your current device.
账户没有密码,是通过 Email 地址完成的:First sign up for an account with your email address. This begins a session on your current device. You must click a link in an email Trunk sends you to verify the connection between your Trunk account and the current computer. Trunk accounts do not have passwords, only per-computer session tokens.
Trunk will publish a canonical JSON representation of your Podspec.
发布到私有源
我们需要一个等价于 ~/.cocoapods/repos/master/Specs 这样的、存放描述文件的 git 仓库。
回到终端,将这个描述文件仓库添加到本地:pod repo add MyRepo https://github.com/yianzhou/PodSpecs.git
到这个目录下:~/.cocoapods/repos/MyRepo,会发现我们的描述文件仓库,已经被 clone 到本地了。它跟 ~/.cocoapods/repos/master 的作用是一样的。
使用私有源需要在 Podflie 中添加版本库地址,若同时使用了公有源,需要同时加上公有源的地址。
source 'https://github.com/yianzhou/PodSpecs.git'
source 'https://github.com/CocoaPods/Specs.git'
pod install时,会拉取 Podflie 中 source 标记的版本库到本地的 repos 文件夹中;然后在 repos 中搜索 SampleLib.podspec 文件。根据文件中描述的源码地址下载并整合到项目中。
Podspec
s.pod_target_xcconfig = {
  'GCC_TREAT_WARNINGS_AS_ERRORS' => 'YES',
  'ENABLE_BITCODE' => 'NO',
  'CLANG_WARN_STRICT_PROTOTYPES' => 'NO',
  'STRIP_INSTALLED_PRODUCT' => 'NO',
  'COPY_PHASE_STRIP' => 'NO',
  'VALID_ARCHS' => 'armv7 arm64 x86_64',
}

mrc_source_files = 'QBBusinessPay/MRC/*.{h,m}'
s.exclude_files = mrc_source_files
s.subspec 'MRC' do |sp|
  sp.requires_arc = false
  sp.source_files = mrc_source_files
end

s.test_spec "Tests" do |spec|
  spec.source_files = "Tests/**/*.{h,hpp,c,cc,cpp,m,mm,swift}"
  spec.requires_app_host = true
  spec.info_plist = {
    'NSPhotoLibraryAddUsageDescription' => '为了提供上传照片、查看照片、保存图片服务,请允许使用相册信息。',
    'NSPhotoLibraryUsageDescription' => '为了提供上传照片、查看照片、保存图片服务,请允许使用相册信息。'
  }
end

spec.vendored_frameworks = "editorFramework/editorFramework.framework"

spec.vendored_libraries = "lib/*.a"
spec.static_framework = true
Podfile
post_install do |installer|
    installer.project.build_configurations.each do |config|
      config.build_settings['GCC_TREAT_WARNINGS_AS_ERRORS'] = "YES"
      config.build_settings["ENABLE_BITCODE"] = "NO"
      config.build_settings["EXCLUDED_ARCHS[sdk=iphoneos*]"] = "armv7"
      config.build_settings["ARCHS[sdk=iphonesimulator*]"] = "x86_64"
    end
end
问题:Development pods 的更改在 build 后没有生效
How to rebuild development pod changes?(Xcode 11.4, pod 1.8.4 试过了,仍然没有解决)
GitHub 上有这个问题的讨论:
Its because of build optimalisation in new Xcode - when it detects no change in input or output files specified for script, the script is not started.
解决方法一:So the solution would be to have no input and out files at all, or during pod install add also content files of frameworks into the input files list.
With New Build System, add to your Podfile, 参考
install! 'cocoapods', :disable_input_output_paths => true
解决方法二:Use legacy build system
解决方法三:I have a possible temporary solution. I added this Run script phase before Embed Pods Framework:
touch "${PODS_ROOT}/*SCRIPT_DIRECTORY*frameworks.sh".(路径直接复制[CP] Embed Pods Frameworks 里面的即可)
It forces Xcode to run the script everytime.
问题:pod 连接慢、安装/更新失败等
[!] Failed to connect to GitHub to update the CocoaPods/Specs specs repo - Please check if you are offline, or that GitHub is down
主要解决方法:更新 Ruby、CocoaPods、openssl 版本。
brew install ruby
ruby --version
export PATH=/usr/local/Cellar/ruby/2.7.1_2/bin:$PATH
which openssl
brew upgrade openssl
export PATH="/usr/local/opt/openssl/bin:$PATH"
brew link openssl --force
删除主库并重新添加:
pod repo remove master
pod setup
cd ~/.cocoapods/repos
pod repo add master https://github.com/CocoaPods/Specs.git
问题:Couldn't determine repo type for URL: "https://cdn.cocoapods.org/': bad URI(is not URI?): "127.0.0.1:12639"
解决:unset http_proxy; unset https_proxy
问题:NoMethodError - undefined method `each' for nil:NilClass
增加 DailyBuild.xcconfig 后 pod install 出现以下错误:
NoMethodError - undefined method `each' for nil:NilClass

      dependent_targets.each do |target|
                       ^^^^^
这里注释掉一行就好了:
project 'Runner', {
  'Debug' => :debug,
  # 'DailyBuild' => :dailybuild,
  'Release' => :release,
}
注意:CocoaPods 只有 debug 和 release 两种配置。如果你有自定义的构建配置(如 DailyBuild),你需要将其映射到 debug 或 release。